 |
Barry and Penarth Model Railway ClubTechnique 3: Building Lightweight BaseboardsBy John Chivers The Barry and Penarth model railway club is based on the 2nd floor of a relatively old building. This means any layout that the club exhibits has to carried down two flights of stairs before the show and back up again afterwards. This has always challenged us into finding new and different ways in which to pack the layouts and to decrease the weight. Our latest concept is to use a plywood sandwich.
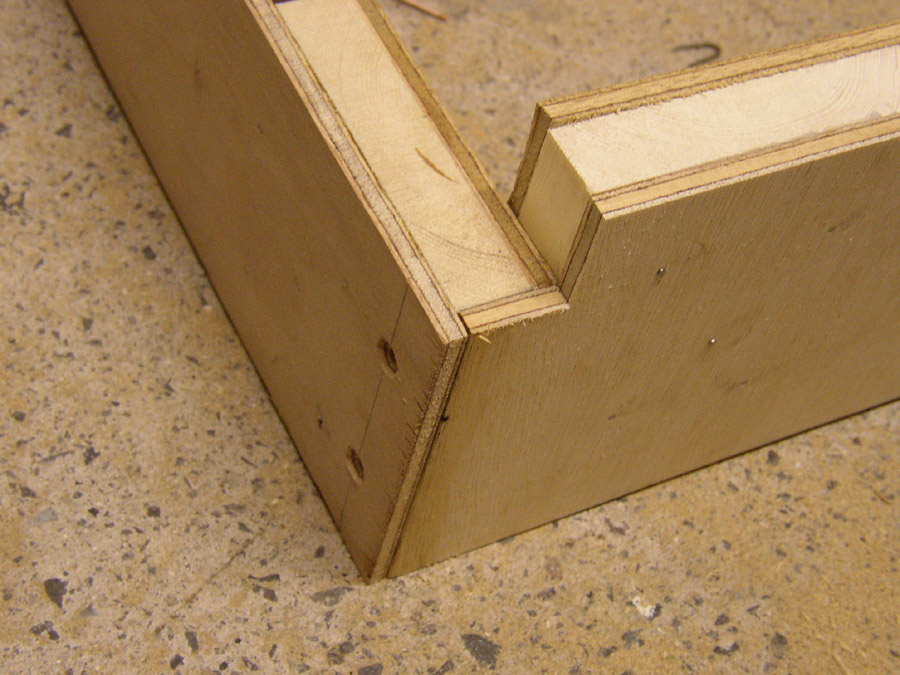
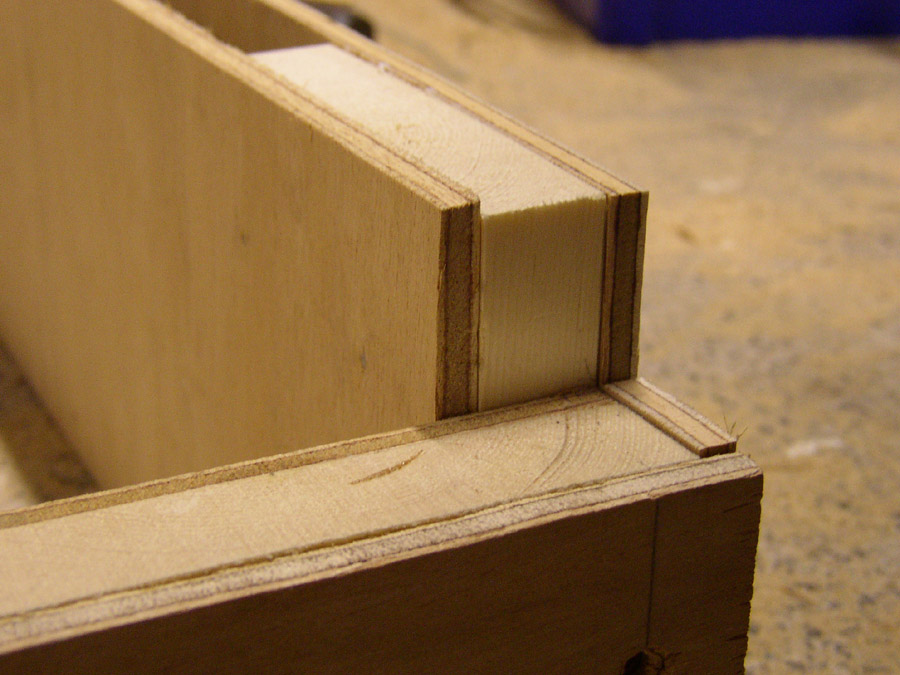
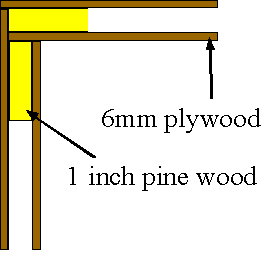
The plywood sandwich is formed using two lengths of thin plywood with pine spacers along the length. For the corners we overlap the ends to give strength and to give a nicer finish.
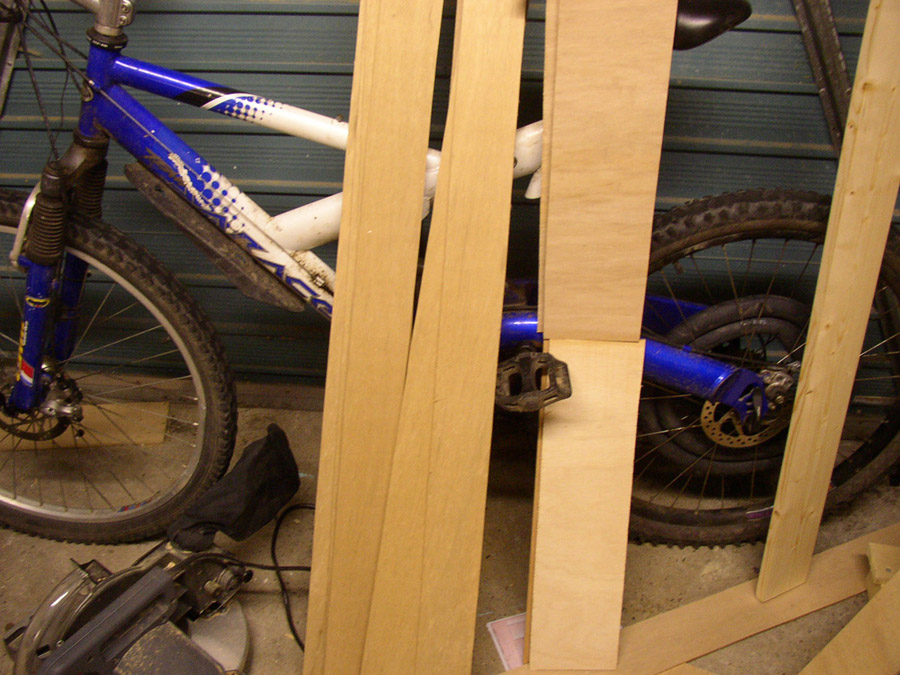
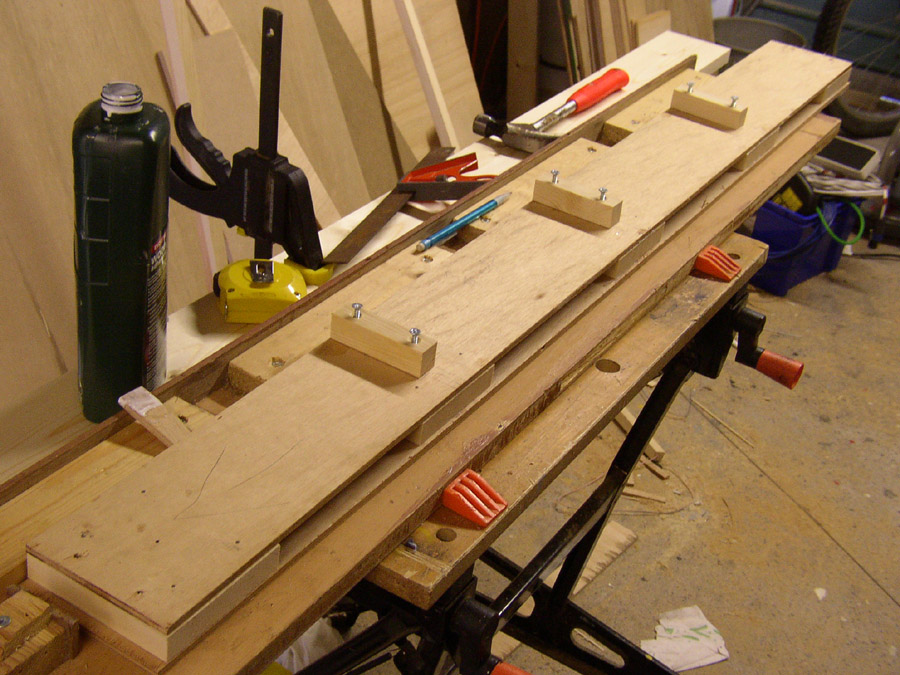
The plywood sides, which are the horizontal plywood strips on the diagram, overlap the end pieces. It is then screwed through the ends to hold it firmly. The size of your boards is completely up to your choice. I’m building the boards 4 foot by 2˝ foot. This is the biggest I can fit in the back of my car! Step 1 For my baseboard I have chosen 4 inch deep sides and 5 inch deep ends. This difference is to allow for the legs to fold into,I’m also going to use 3 inch deep stretchers to support the top board to stop it from twisting or sagging. So the first task is to strip the plywood into lengths of the right size. For my case 4 x 4 inch for every board (sides), 4 x 5 inch for every board (ends) and 3 inch strips for the stretchers. I’m using a stretcher every foot of base board. Step 2 Cut Spacers to fit between the plywood layers. I have use 4 by 1 blocks of pine, this is over engineering as you only need to use 2 by 1 blocks and it will be suitably strong. I have used 16 blocks per board. Step 3 This stage is the assembling of the sides. The outside piece of plywood has to be twice the thickness of your plywood longer than the inside piece. This is because of the overlapping corners. All the Spacers I have fitted have been glued with PVA glue and pinned with 15mm panel pins. 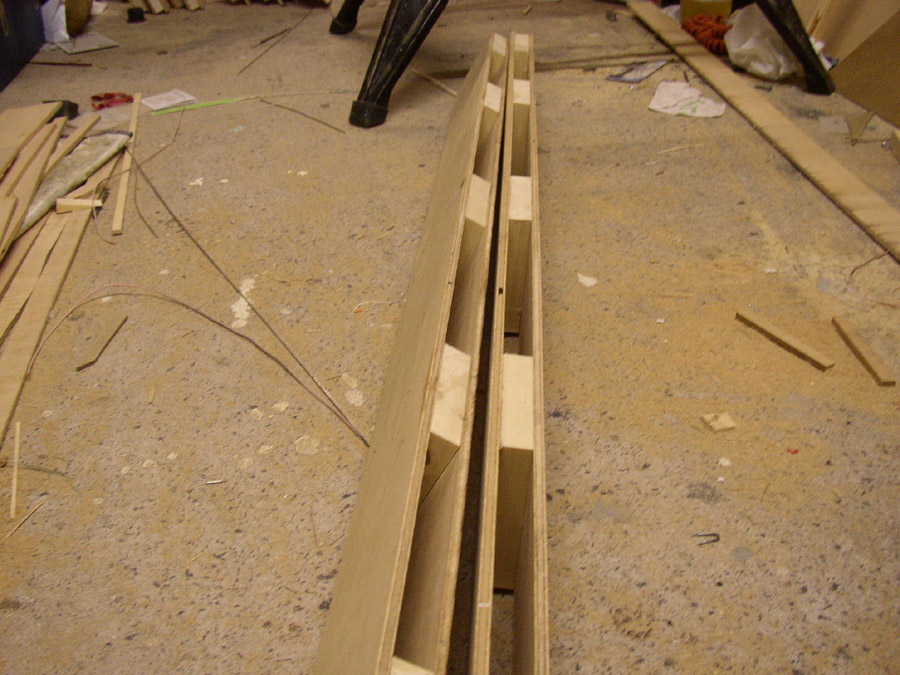
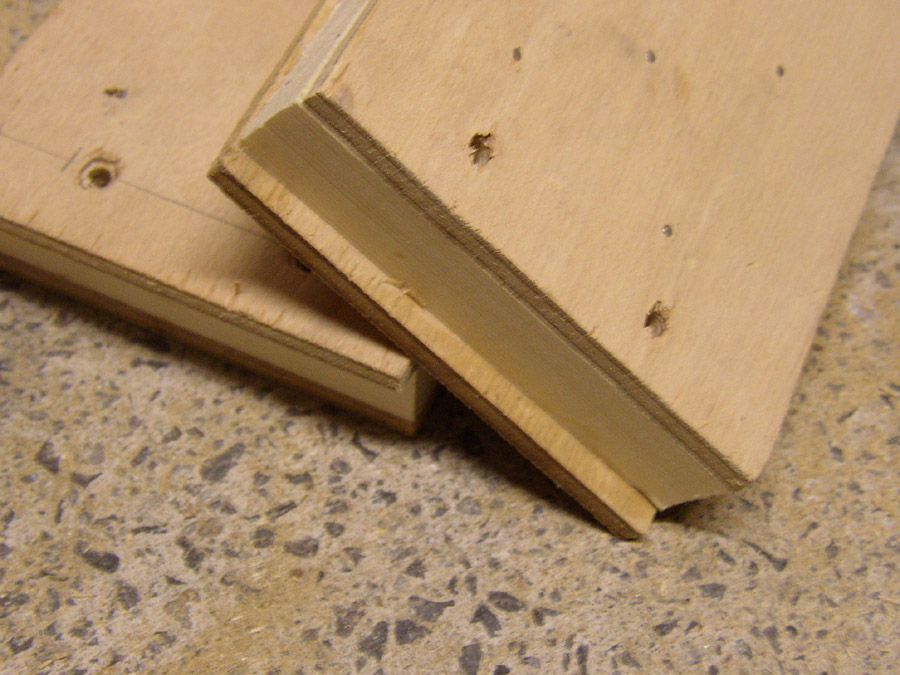
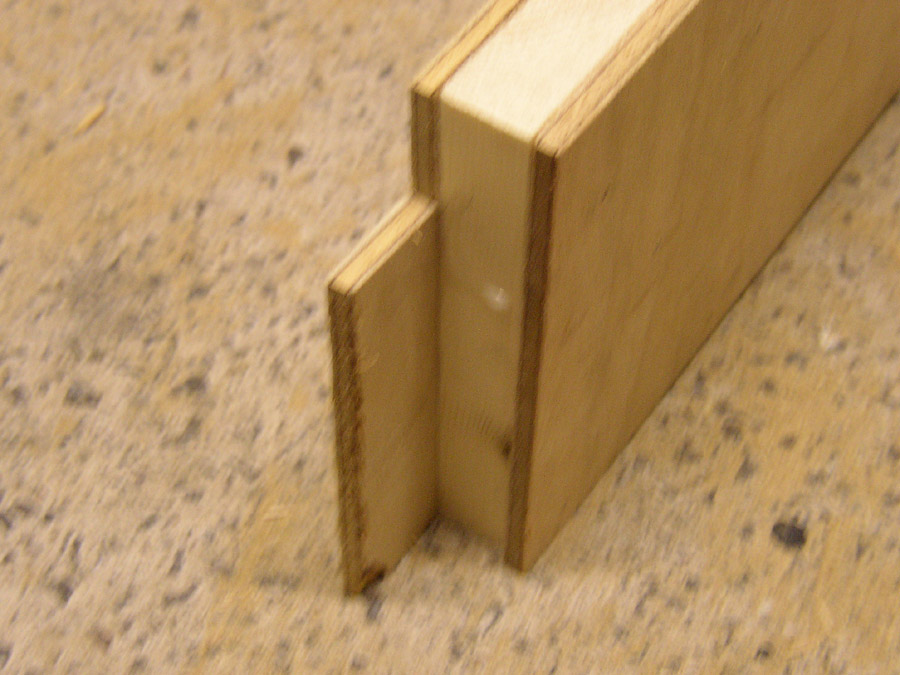
Step 4 The next step is very similar to the previous but this time you will need to measure the width you need for the inside piece. Cut and attach spacers onto the inside end piece, then measure the outside piece as the outside piece will be substantially longer than the inner as it has to overlap the spacer in the side frames. Due to the fact I have used deeper end pieces I have elected to remove a corner piece to make the joint look neater. 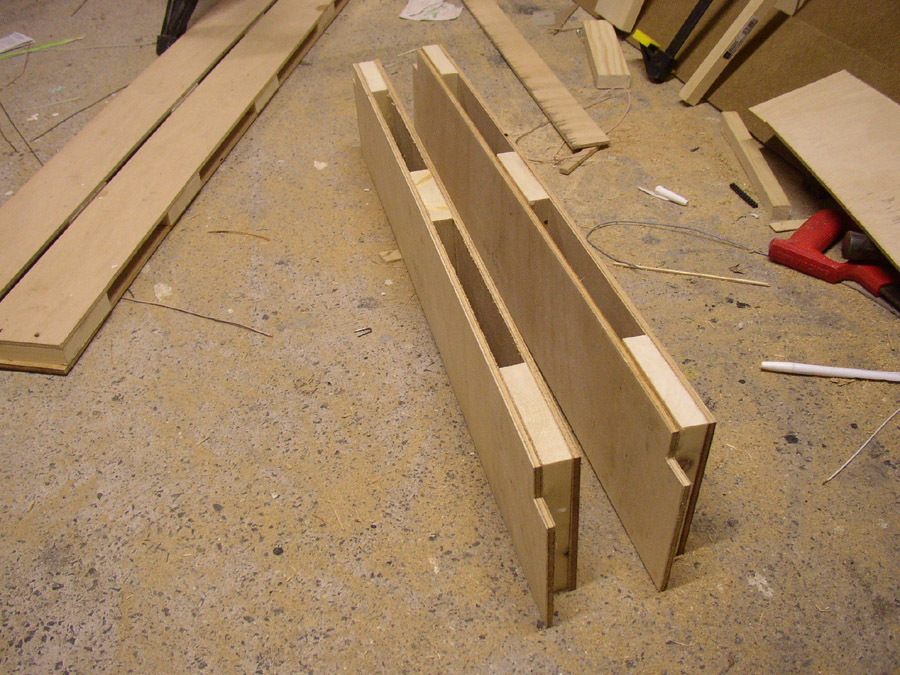
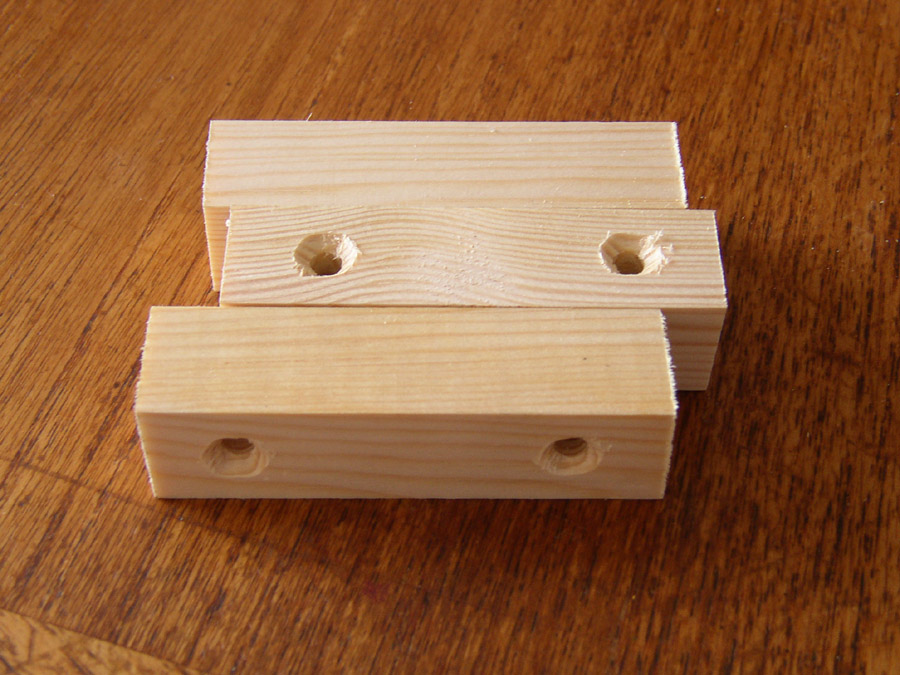
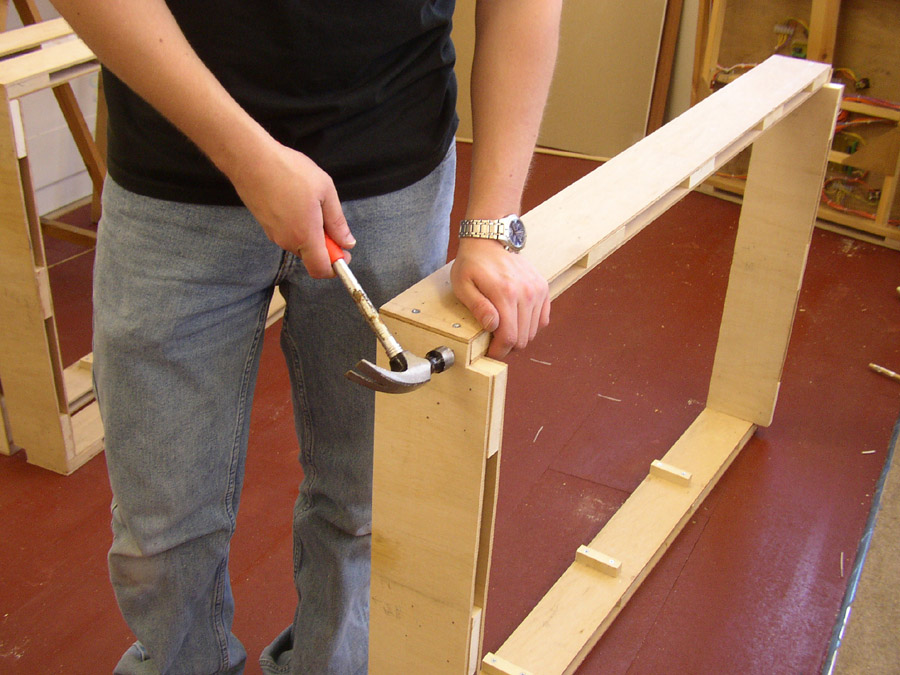
Step 5 Mark out and drill through the side frames 2 holes at each end for screwing the sides and ends together. You can choose whether or not to countersink these holes or not. I’m trying to keep the front face as clean as possible to paint straight onto it later on. Step 6 Cut yourself a set of blocks to attach your stretchers to the side frames. Then drill two holes in each and countersink one side of each block.
Step 7 Mark out and attach blocks where you have your spacer blocks between the two lengths of plywood. Step 8 Measure the length of your inner end piece. This should then give you the length of your stretchers, which you can then cut out. 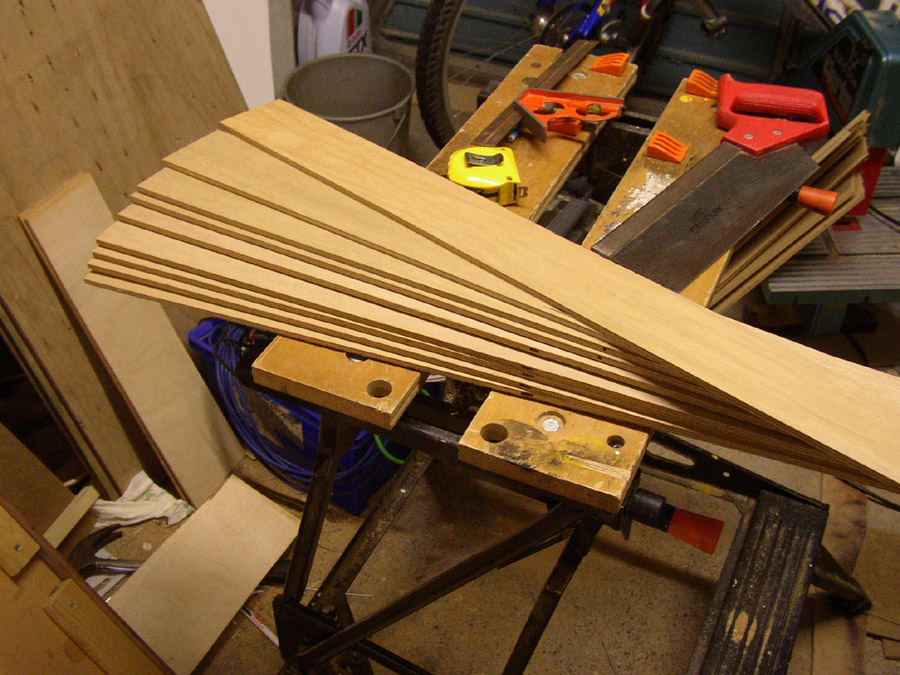
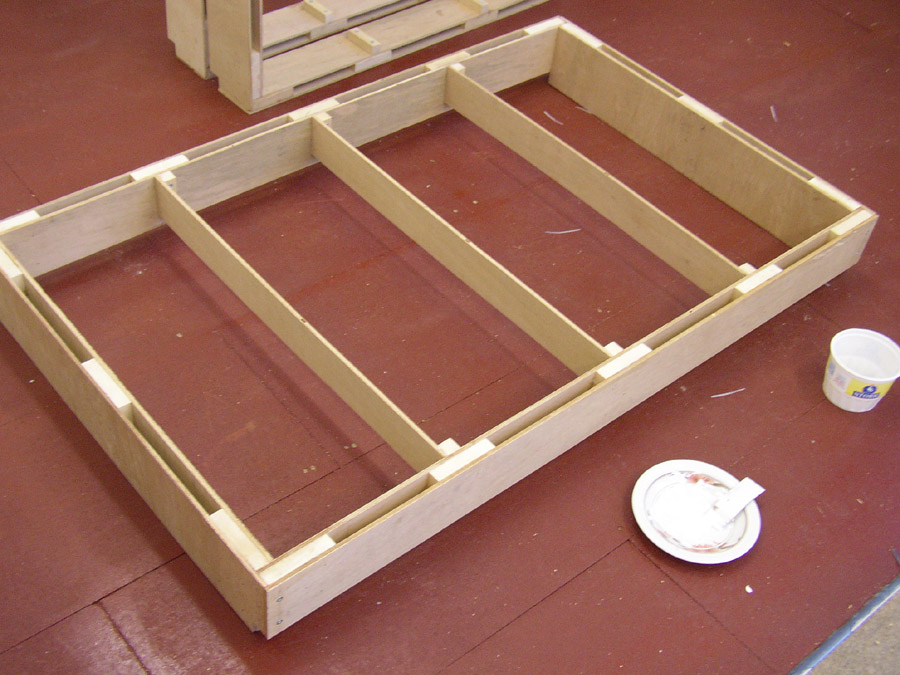
These are the final pieces for the baseboard, from here it is only fitting the pieces together. The Construction
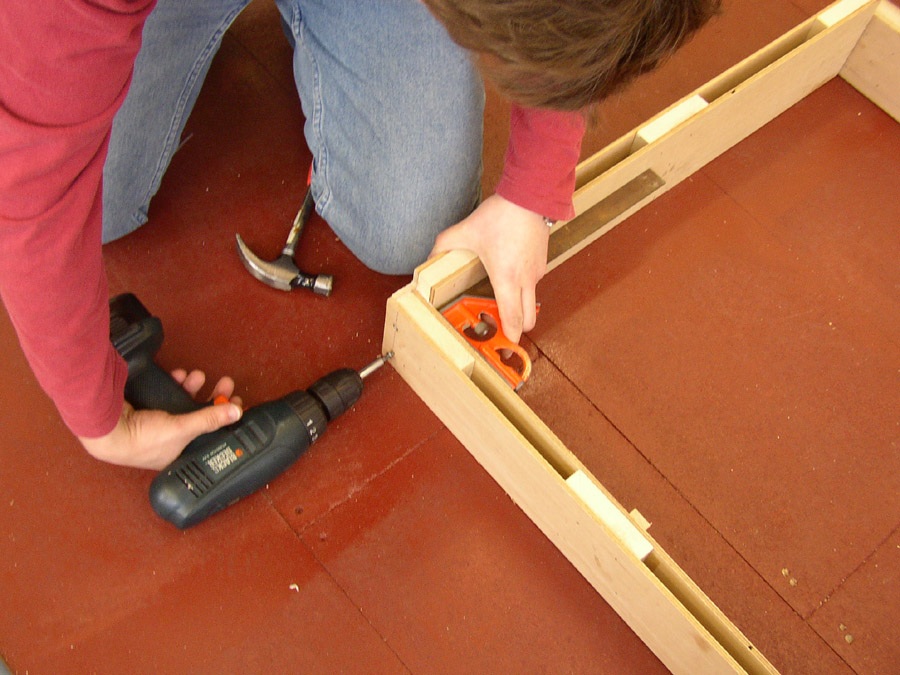
The most essential part of this stage is to ensure the boards are square and level. This will create a flat surface for the top deck. In the pictures below you can see me using an engineers square as I screw the pieces together.
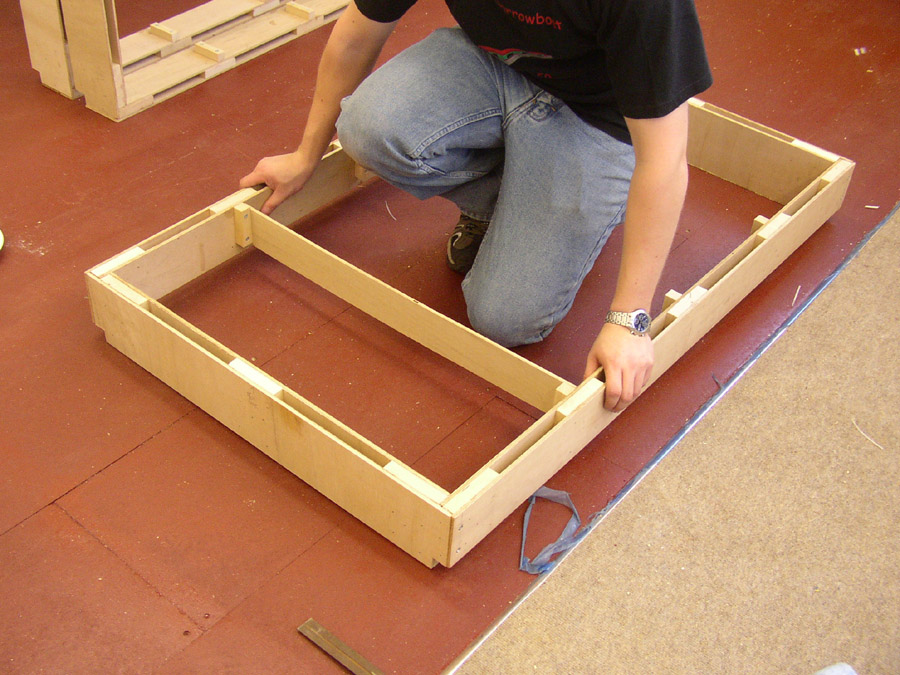
Once you have screwed the four main parts to the baseboard you should then pin the other side just to secure it. Finally you can then attach the stretchers across the boards to finish them off
Back to tips and techniques page
|

 |