Barry and Penarth Model Railway Club
Technique 2: Bachmann 158 Trailer lighting repair
Gwynne Chivers has just had to repair a Bachman class 158 and has recorded the process. It is offered here in good faith for other owners of this model which have developed this fault. Barry & Penarth MRC cannot be held responsible if it does not work in your hands.
The head and tail lights on the unpowered cars of the 158/159 sets from Bachmann are known to be prone to failure due to the connecting wires coming apart from the bogie connection. At first the joints can be re-soldered with relative ease, but on occasions the wire from the body is either too short or disappears inside the vehicle body.
This note describes how to correct the fault when there does not appear to be enough wire to repair the unit.
-
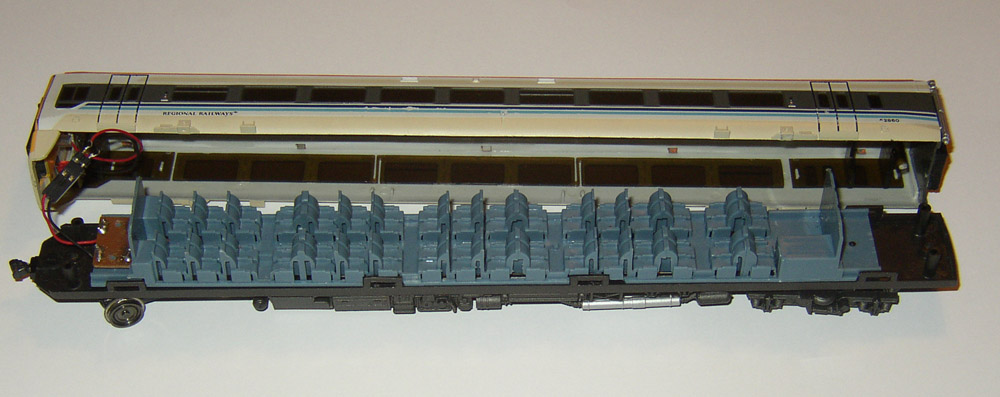
Remove the two screws in the underframe securing the body to the chassis and with the aid of some card gently remove the chassis from the body. The chassis must be slid rearwards for the front dummy coupling to slide through the hole in the front air dam.
-
Detach the electric plug between the chassis and the lighting unit in the body.
-
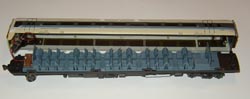
Remove the two screws holding the seating unit to the chassis and lift the seating unit gently away. The connecting wires and resistor board are attached to the seating unit.
(see photo 1 - click on the image for a larger view).
-
Releasing the seating unit should release any spare wire that was trapped beneath the unit, allowing more to be fed through to the bogie. If not the resistor board must be removed from the chassis unit. This has been attached by two lugs through the board and these will break on removal. Solder two new wires to the resistor board and then superglue the board back in place on the seating unit.
-
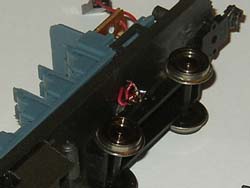
Gently feed the wires through the holes in the chassis and solder to the side connections of the bogie.
-
Attach the seating unit to the chassis, ensuring that there is a small loop of wire below the chassis to allow for bogie swing.
(see photo 2 - click on the image for a larger view).
-
Re-connect the lighting unit plug and check the operation of the lights. If the lights operate in the wrong direction reverse the plug.
-
Replace the chassis in the bodyshell, making sure that the dummy coupler slides through the hole and the chassis unit is fully forward in the body, and replace the two screws.
Back to tips and techniques page